CapCut (formerly known as JianYing), a popular video editing app developed by ByteDance, recently launched its highly anticipated online screen recording feature. Why is CapCute so widely popular worldwide? It is attributed to its seamless editing workflow, high-quality output, and a rich source of material. With its intuitive interface, users (both beginners and experienced editors) can create professional-looking videos easily.
Whether you’re explaining a tutorial, adding commentary to a gaming video, or just overlaying background music, recording is essential. So, how to record on CapCut? Well, this blog will show you a step-by-step guide on how to record audio on CapCut. Please keep reading!

How to Record on CapCut? [Step-by-Step]
CapCut is a simple-to-use video recording and editing software that enables users to merge text and effects into videos easily. With its user-friendly interface and comprehensive set of features, whether you are a professional videographer or a novice content creator, CapCut will guide you on how to screen record on CapCut. Some of the advantages of this easy screen recorder are listed below:
- Voice-Over Support: For those who want to create educational materials, weave a story, or provide insights during gameplay, the voice-over feature of CapCut is indispensable.
- Easy Audio Enhancement: CapCut’s audio enhancer dynamically adjusts volume levels and improves the sound quality of recordings, which is beneficial for video bloggers navigating different recording environments.
Now that you learn the benefits of recording videos on CapCut, how to screen record on CapCut? Here is a step-by-step guide:
Step 1. Visit the CapCut website on your browser > Sign in with your Google, Facebook, or TikTok credentials. (Also, you can create a new account by providing your email and password.)
Step 2. On the Start page, click “+” (New video) > Click the Record icon in the Media section > Choose the Record entire screen option to start screen recording.

Step 3. Choose a page under the Chrome Tab, Window, Entire Screen section and click Share > Turn on microphone as needed and then click the red Record button.

When the recording is complete, click the red Done button to stop recording. Then, you can make some necessary edits to the recording and proceed to save or export the video.
Is CapCut safe? Yes! While CapCut is generally regarded as safe for use, it's worth noting that the app lacks robust content filtering. Consequently, its suitability for children is uncertain.
FAQs about CapCut Screen Recording
Here are the answers to some frequently asked questions about how to record on CapCut:
1. How to save CapCut video?
The way of how to save CapCut video is quite simple. Just click the Export button in the upper right corner of the editing screen. Then, click Download to select the desired resolution and quality settings and click Export again to save the video to the device’s gallery.
2. How to put videos on CapCut?
Click the New video option on the Start page > Under the Media section, click the “+” icon to upload videos, or drag and drop your video file to put videos on CapCut. (Alternatively, you can access your files in Google Drive or Dropbox to upload your video directly.)
3. How to add voice record on CapCut?
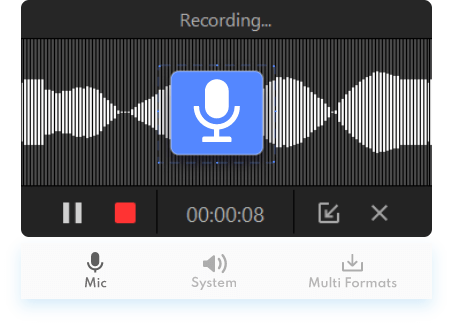
After selecting the screen you want to record, you will see the prompt “Ready to record”. Turn on the microphone next to the Record button, and then click Record to start recording a video with your voice.
Also Read: 2 Simple Ways to Add Music to a Video Free >>
Best CapCut Alternative: Premium Screen Recording Support
It is important to recognize that CapCut primarily caters to video editing needs and lacks certain advanced screen recording features such as scheduled recording, teleprompter, voice changer, and noise reduction. As a result, individuals with more extensive screen recording needs may find it beneficial to use third-party software like iTop Screen Recorder.
With the help of this screen recorder, you can choose flexible screen sizes to record gameplay, online meetings, or anything you want to record, with or without audio or a webcam. Some more benefits of iTop Screen Recorder are listed below:
-
Best CapCut alternative to capture anything free & easy.
iTop Screen Recorder is one of the best CapCut alternatives to help you capture meetings, games, or whatever you want to record; its HD screen recording feature ensures that you capture screen activities clearly and accurately. -
High quality audio recording with noise reduction.
iTop Screen Recorder’s noise reduction feature effectively eliminates unwanted ambient sounds such as gusts of wind, traffic noise, or device humming from your recordings, allowing you to capture sound without unwanted background interference. -
Advanced video editor for post creation.
iTop Screen Recorder has a built-in video editor that can easily help you edit videos, add effects, transitions, annotations and more to create professional-looking content. -
Customizable region screenshot feature.
With iTop Screen Recorder, you can easily capture screenshots of specific areas of your screen, which allows you to record a part of your screen, whether it’s part of a web page or any other screen element. -
Built-in teleprompter with scripts for various topics.
With its built-in teleprompter feature, you can access pre-written scripts on a variety of topics directly in the recorder, making it easier to stay on track and deliver your message. -
Auto start and end recording at scheduled times.
iTop Screen Recorder makes it easy to capture content on your own time by allowing you to set recording to start and end automatically at scheduled times, ensuring you don’t miss important events.
Now that you learn the benefits of using iTop Screen Recorder to screen record, how to record your screen using this screen recorder for Windows 10? Follow the simple steps below:
Step 1. First download iTop Screen Recorder and then follow the on-screen instructions to install it on your Windows PC.
Step 2. Open iTop Screen Recorder and navigate to the Settings section. Then, click Format > Video to adjust settings such as resolution, format, frame rate, bit rate, and quality.

Step 3. In the Record > Screen tab, click the drop-down arrow to select the recording area. Then, turn on Speaker, Mic, Webcam, and Mouse as you need > Click the REC button to begin.

To finish recording, click the red square Done button. Afterward, you can go to Files > Video to view, rename, or share your recording directly on social media platforms. Also, you can click Edit to trim, resize, rotate and add text, images or effects to your recording.

Conclusion
After reading this post, you know how to record on CapCut. There is no denying that CapCut is an excellent video editing tool that can help you modify your videos to perfection, but it lacks certain advanced screen recording features (like scheduled recording, teleprompter, and more). As a result, if you are aiming for screen recording, iTop screen recorder is a great option for you, which can help you easily screen record with audio and webcam. Why not try it out? Get iTop screen recorder download for free.
 Vidnoz AI creates engaging videos with realistic AI avatars. Free, fast and easy-to-use.


