Since the pandemic came, people have been searching for better ways to reach out regardless of the physical distance. Online apps that support video calling and conferencing are now more famous than ever and that’s why everyone working remotely knows about Zoom.

It’s the top SaaS product that supports multi-person access and it’s free to use during these times. As people use it, they happen to search for how to record a Zoom meeting. The problem is that you will require permission from the host if you are not the one hosting.
We will look at how you can record a Zoom meeting on different devices with or without permission. Whether you are using your phone or computer, we have covered all that in detail below.
- This is an Article Index.
- Do not insert any text in here.
- This index will be generated automatically when displayed on the front end.
- Of course we still love you.
Part 1: How to Get the Zoom Recording Privileges from the Host
You can learn how to record Zoom meetings as a participant by asking for permission from the host. The host can record the meeting and Zoom notifies those in session about the recording.
As the participant, you need to ask for permission. After that, the host will perform the following:
Step 1: In the Zoom meeting, click on ‘Participants’.
Step 2: In the menu, hover on the participant who needs to record.

Step 3: Next to their name, click ‘More’ and then ‘Allow Record’ to grant the recording permission.

Step 4: The participant will receive a notification that they are now free to record the meeting.
Step 5: There will be a recording icon next to the name as the participant records.

Part 2: How to Record Zoom Meeting on iPhone/iPad
You can also learn how to record a Zoom meeting on iPhone, which is much easier. The iOS devices have an inbuilt recording feature that allows you to record your screen proceedings on iPhone.
Here is how to record a Zoom meeting on iPhone using the inbuilt recorder.
Step 1: Enable the recording feature by adding it to the control panel. Visit Settings> Control Center> Customize Controls. Tap on the green plus icon next to ‘Screen Recording’ to add the feature on the control panel.
Step 2: Once the Zoom meeting starts, access the control panel and tap on the recording button.
Step 3: You will see the screen recording countdown before the button turns red. Once you are done, click on the stop button and access the video in Photos.
You may like: Troubleshoot: iOS 14/13/12/11 Screen Recording Not Working
Part 3: How to Record a Zoom Meeting on Android Phone with Audio
Like iPhones, Androids are joining the band by having built-in recorders. So, how to record Zoom meetings on Android phone with audio is also easy since most Android phones are updated to include such features on the phone.
If you don’t have the inbuilt recorder, there are tons of apps on Google Play for that. The steps below will show you how to record a Zoom meeting using the inbuilt recorder on Mi Phone with Android 10 (MIUI 12.0.3).
Step 1: Access the recorder from the control panel by flipping from the top right corner.
Step 2: Tap on the icon to start the recorder app.

Step 3: Check the red button on the bottom right of the screen. It has a counter on the right to show the video progress.
Step 4: Record the Zoom meeting for as long as you wish. Tap on the red button again twice to stop the recording.
Step 5: Access the video on the screen recorder app or the gallery.
Part 4: How to Record a Zoom Meeting Without Permission on Windows
Smartphones use is on the rise, and that’s why we have covered how to record Zoom meetings on phones for Android and iOS. Quality Zoom meetings should be on your PC, though, and that’s why it’s essential to learn how to record the session on your machine.
#1 - Record a Zoom Meeting by iTop Screen Recorder
If the host doesn’t permit you to record it, you can use third-party apps for that. With an iTop screen recorder, you can learn how to record Zoom meetings without permission since this is a third-party app that Zoom will not detect.
It has the support of iTop free Screen Recorder, enabling you to record Zoom without permission. If you are in a situation where you would like to record a Zoom meeting regardless of the restrictions, you can utilize the iTop application or the online version.
It’s an application that will help you record quality Zoom meeting videos without lagging the machine. All you need is to download and install it to enjoy the features for free.
iTop possesses the following when it comes to Zoom and screen recording in general:
Free of charge: You don’t pay anything to use iTop Screen Recorder. There are plenty of features you can use on the free version too. If you want exclusive access to everything, you can upgrade to an affordable subscription.
Record with no permission: iTop Screen Recorder is a third-party application that can record your screen whenever you need to do it. So, if there is a Zoom meeting, all you need is to start it and let it run in the background.
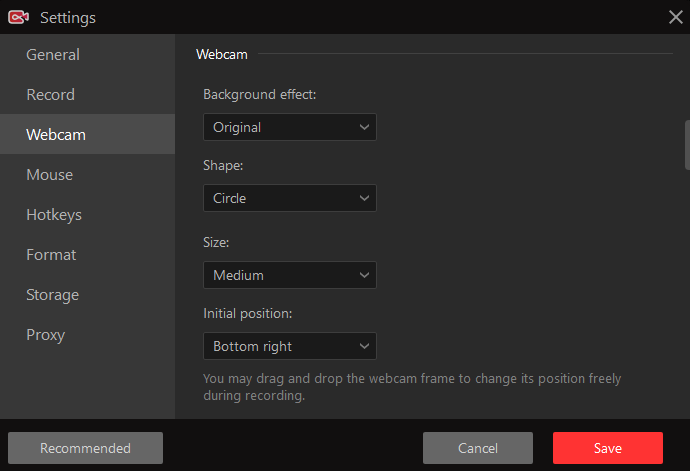
Audio & Webcam: With iTop Screen Recorder, you can record Zoom meetings including your webcam. Just toggle with the settings before you hit the start button.

Schedule your recording: You can let the iTop Screen Recorder know when to record and stop. That allows you to concentrate on the Zoom meeting as iTop collects the information in the background when it’s time to do it.
 Supports 33 languages: iTop Screen Recorder supports English, Filipino, Suomi, Vlaams, French, Deutsh, Hungarian, Indonesia, Italiano, Japanese, and so on.
How to Record Zoom Meeting without Permission for free by iTop Screen Recorder?
Here is how to record a Zoom meeting without permission with iTop Screen Recorder if you don’t have the permission:
Step 1: Download and install iTop on your PC. It’s compatible with Windows XP/Vista/7/8/8.1/10/11.
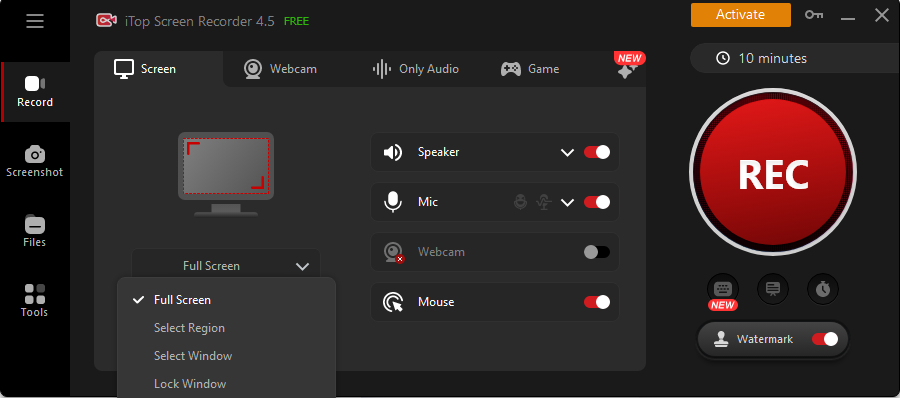
Step 2: Select the region you want to record, switch on the speaker, mic, and webcam according to your needs.

Step 4: Click on the REC button or hit F9 to start recording.

Step 5: Click on the red button or tap F11 to end the Zoom recording, saving the Zoom meeting to your local.
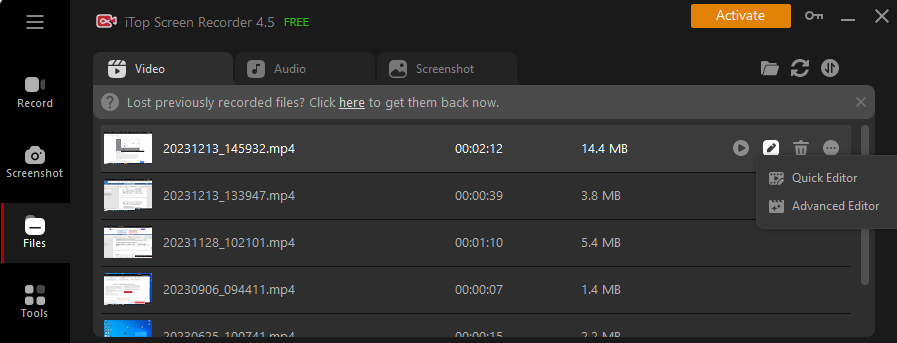
Step 6: Open Files to check, edit, delete your local Zoom meeting videos.

#2 - Record a Zoom Meeting by Chrome Extensions
iTop has an online version that you can use directly without downloading anything or installing an extension. The problem is that it has time and usage limitations. You will also need an editing app to rectify the video when required.
If you want to record longer via Chrome, you need an extension with no limitation at all. You can learn how to record Zoom meeting on Chromebook or the Chrome browser in another OS using extensions compatible with the browser.
1 - ScreenCastify
ScreenCastify has more than one million users, and it’s famous in the education sector. You can check how to record a Zoom meeting and share the video vis the extension. It also allows you to edit whenever necessary, and it’s integrated with Google Drive.
You can save the file as an MP4 or audio-only in MP3. GIF is also supported.
2 - Loom
Loom is another extension that you can use to record Zoom meetings on Chrome. It’s popular in the gaming niche, and the features are now upgraded, where most of them are accessible via the paid version. You can quickly record and edit afterward.
The free version allows you to record for five minutes, and you can access up to 100 videos on the workspace. You will need to upgrade if you want to access more. Once you switch to the upgrade, you get 4K quality videos and password protection, among other features.
Part 5: How to Record a Zoom Meeting Online | Win & Mac
Those attending Zoom meetings online can record the sessions using the iTop online screen recorder. You don’t need any permission here and how to record a Zoom meeting is accessible without downloading anything.
The iTop online version, iTop free online screen recorder, does not provide a plugin, which means using it directly on the website.
Here are the steps you need to use the iTop online screen recorder:
Step 1: Click on Start Recording Now button on the website once you land on the online screen recorder page via the top navigation tabs.

Step 2: Choose the recording more and establish the audio source.

Next, select the entire screen, browser tab recorder, or the software window recorder.

Step 3: Click on the recording button to start the recording session.
Step 4: Once done, click on the Stop button and save the video on your local storage. You can view the video using the default players on your computer.

Don't Miss: Check how to record video while screen is off, thus you can capture your long Zoom meetings while you are not in front of your screen >>
Part 6: How to Record a Zoom Meeting on Mac
You can use the screenshot toolbar or the QuickTime player to record the Zoom meetings if you are on Mac. The steps will show you how to record a Zoom meeting using the app on macOS.
#1 - Record a Zoom Meeting with Screenshot Toolbar
The screenshot toolbar is a plugin available on MacBook computers, and you can use it if you have macOS Mojave or later. Follow the steps below to start using it:
Step 1: Wake up screenshot toolbar with the hotkey.

Step 2: Click on the tool you want to use depending on whether you want to capture or record. You can also select the size of the screen you want to record.
Step 3: Click the option you would like to record the Zoom meeting. There are features such as times delay and specifying where to save the recording.
Step 4: Start the recording by clicking on the recording button. It’s also what you will use to stop the video recording.
#2 - Record a Zoom Meeting with QuickTime Player
You can also use the QuickTime play on macOS to record the Zoom meetings without permission. Here are the steps you need to get the video.
Step 1: Access the QuickTime player and then visit File > New Screen Recording from the menu. The Zoom meeting should be ongoing as you do so.
Step 2: Click on the red button to start recording. You can also click on the arrow beside it to change the settings. If you want to record the audio or your voice, click on the microphone icon.
Step 3: If you want to record the entire screen, click anywhere on the screen to begin. For window recording, drag to select the area and then click Start Recording.
Step 4: Click on the Stop button to stop recording. QuickTime Player will play the video, edit, and share.
You may like: [Record Mac Screen] How to Record Your Screen on MacBook Pro
Conclusion
You now know how to record a Zoom meeting on different devices. You can use the most convenient one to get the Zoom sessions with or without permission. The iTop solution is the most recommendable method since you only need to download and kick start the screen recording.
 Vidnoz AI creates engaging videos with realistic AI avatars. Free, fast and easy-to-use.


