Do you know it might be a lot easier than you think to record PS4 gameplay? If you wish to share gameplay footage from your gaming sessions with others, this article will help you with a better understanding of the feathers of your PlayStation 4, the recording capabilities, as well as the basic editing tools.

Also, you can figure out how to record PS4 gameplay on PC, on PS4, and with capture cards in this article. Want to have a high-quality game capture file? Want to know how to record the previous 15 minutes of gaming without needing to press the record button? Keep reading.
[PS4 End] How to Record Gameplay on PS4 with the Share Button
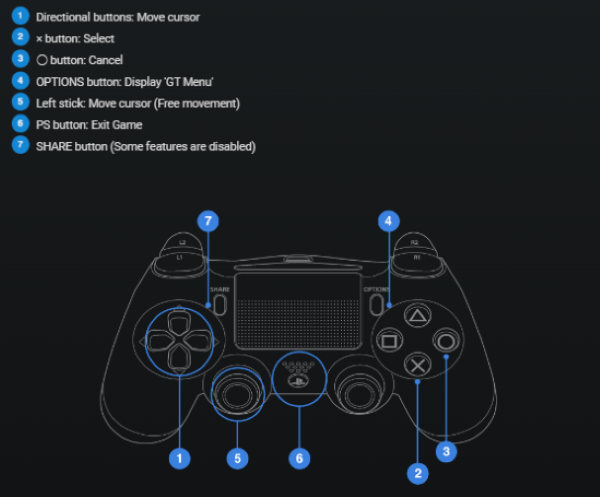
Firstly, let’s look at how to record gameplay on PS4. But before that, some people may ask what is PS4. PS4 or PlayStation 4 is manufactured by Sony Computer Entertainment and used as a home video game console. PS4 has a built-in recording feature and it’s free to use. With the built-in recording tool, you can easily record gameplay on PS4. Simply by double pressing the “Share” button on the PS4 controller, the recording will be started. If you want to end the recording, press the “Share” button twice. Yes! As easy as this! You don’t need to be a professional. In the following part, we will introduce 3 recording situations while recording gameplay on PS4.
1. Record gameplay on PS4 instantaneously:
As an incredible console, PS4 allows you to record gameplay on PS4 instantaneously. The default recording time is 15 minutes, but you can adjust it to a maximum of 60 minutes. Below are steps on how to record gameplay on PS4 instantaneously.
Step 1. Open the PS4 and go to “Settings” – “Sharing and Broadcasts”, and change the default length of the video clip according to your preference.

Step 2. To start recording, double press the “Share” button on the left top of the controller. You can now record gameplay on PS4 instantaneously.
2. Record gameplay on PS4 retroactively:
However, if you forget to double press the “Share” button to record gameplay on PS4, no worries, you are still able to save the last 15 minutes of gameplay to videos. Check below for how to record gameplay on PS4 retroactively.
Step 1: Tap the “Share” button once on your PS4 controller to access the Share menu.
Step 2: Choose “Save Video Clip” and save the last 15 minutes of gameplay.

You May Like: How to Record Game Play on Nintendo Switch & Switch Lite [Without Limitation] >>
3. Record PS4 Gameplay With Party Chat:
If you are playing games with your friends and want to record PS4 gameplay with everyone’s voice, here are the steps on how to record gameplay on PS4 with party chat:
Step 1: Go to “Party Settings” at the main panel, select “Allow Your Voice to Be Shared”, and choose either “Always Allow” or “Allow for Current Party”. Everybody in the party who wants the voice to be picked up should have this setting on.
Step 2: Go to “Settings” at the main panel, choose “Sharing and Broadcasts”, select “Audio Sharing Settings” and choose both “Include Microphone Audio in Broadcasts” and “Share Party Audio”.

Step 3: Double-tap the “Share” button to record a game.
However, there are some limitations to recording gameplay on PS4 using the internal recording tool. For example, the recording time is limited and it does not allow recording in much higher quality.
Also Read: How to Record Part of Screen on Windows and Mac >>
[PC End] How to Record PS4 Gameplay on PC with PS Remote Play
As stated above, the built-in recording tool is not suitable for people who want to create long gameplay recordings and seek high video quality. What’s more, recording gameplay on PS4 takes up a lot of internal capacity on the device, and it only captures gameplay clips and cannot catch anything outside the game. We recommend using PS Remote Play and iTop Screen Recorder to bypass the limitations above. In the next part, we will illustrate how to record PS4 gameplay on PC in detail.
1st. Connect PS Remote Play with PC
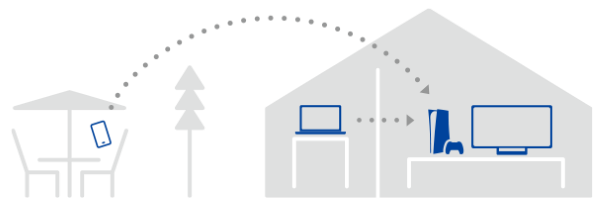
What is PS Remote Play? PS Remote Play streams your PlayStation games from your console to your phone, tablet, laptop, or desktop. This means you can start playing your games on the chosen device. Let’s now look at how to connect PS Remote Play with a PC.
Step 1: Download and install the free PS Remote Play app.

Step 2: Set up your PS4 console. Firstly, go to “Settings” choose “Remote Play Connection Settings”, and turn on “Enable Remote Play”. Secondly, go to “Settings” and choose “Account Management”, then click “Activate as Your Primary PS4”. You will only need to do this the first time you use Remote Play.

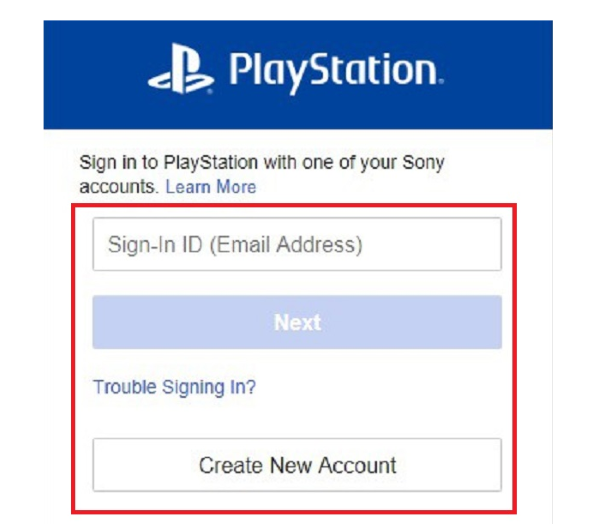
Step 3: Turn on your PS4 console and use a USB cable to connect your controller to your Windows PC. Launch PS Remote Play and sign in with the same account that you use for your PS4 console. Connect to your PS4 and then your PS4 console will be displayed on your Windows PC and you can start using Remote Play.
2nd. Record PS4 Gameplay on PC
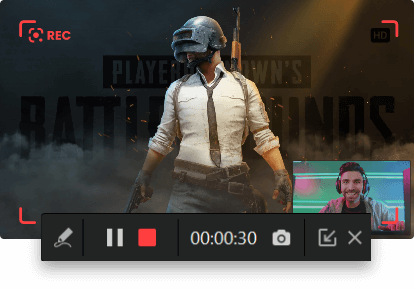
After connecting PS Remote Play with PC, we can now record PS4 gameplay on PC with iTop Screen Recorder.
Step 1: Download iTop Screen Recorder and install it on your PC.
Step 2: Switch on the Speaker, Mic, and Webcam.
Step 3: Select the Windows screen region you want to capture.

Step 4: Tab the REC button or press the F9 hotkey to start the PS4 gameplay record.

iTop Screen Recorder is famous for its power on game recording. Below are some game-related features of iTop Screen Recorder.
Main Game-Related Features of iTop Screen Recorder
- Easy to Use with Unlimited Recording Time: Unlike the PS4 internal recording tool, you can record PS4 gameplay simply with unlimited recording time.
- Game Mode: iTop Screen Recorder provides a game mode and enables you to record PS4 gameplay smoothly without lagging.
- Audio & Webcam: You can record PS4 gameplay with audio as well as a webcam.
- Quick Share: Upload game clips to YouTube, Vimeo, Instagram, and Facebook in just one click.
- Screenshot while Recording: iTop Screen Recorder supports capturing screenshots during recording without a stop.
- Video Editor: With the built-in editing tool, you can make your recorded video more interesting by adding special filters, effects, etc.
iTop Screen Recorder gives the simplest solution to record PS4 gameplay. It allows you to access all the powerful feathers. Check it out!
How to Record PS4 Gameplay on PC with Capture Card
If you don’t have a high-speed internet connection, you can record PS4 gameplay with a capture card and iTop Screen Recorder. Here are the detailed steps to record PS4 gameplay on a PC with a capture card.
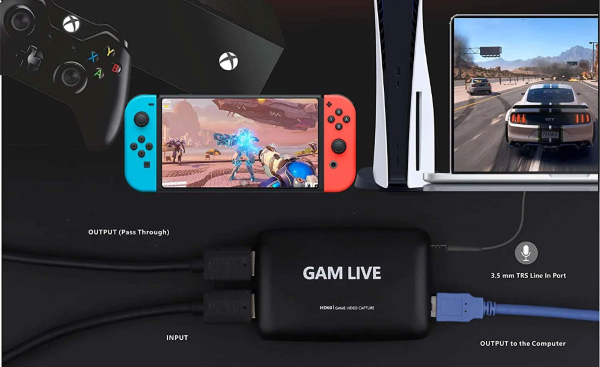
Step 1: Purchase a video capture card, HDMI cables, and USB 3.0 cables/data cables.
Step 2: Use an HDMI cable to connect your PS4 console to the capture device and use another HDMI cable to connect the PS4 console to your PC. Then connect the PC to the capture device using a USB cable. After this, your PS4 should be connected to your PC via a capture card.
Step 3: Disable HDCP on PS4 and ensure your PS4 software is updated.
Step 4: Turn on your PS4 and launch your iTop Screen Recorder. Start the gameplay and record it on PC with iTop Screen Recorder.
It is one of the common methods to record PS4 gameplay on a PC with a capture card. However, if you don’t feel like putting effort and money into a capture card, you’d better use the PS4’s internal capture tool or iTop Screen Recorder instead.
Also Read: How to Record Your Screen on Windows 10 with Sound [Free] >>
Conclusion
Due to the limitations of the PS4 internal recording tool, we strongly recommend you use iTop Screen Recorder to bypass all the inconveniences. As one of the best gaming recorders, iTop Screen Recorder is easy to record PS4 gameplay with powerful feathers like editing, HD videos, no laggings, etc. If you are wondering how to record gameplay on PS4, give iTop Screen Recorder a chance. Download it today and record PS4 gameplay with no hassle.
 Vidnoz AI creates engaging videos with realistic AI avatars. Free, fast and easy-to-use.


